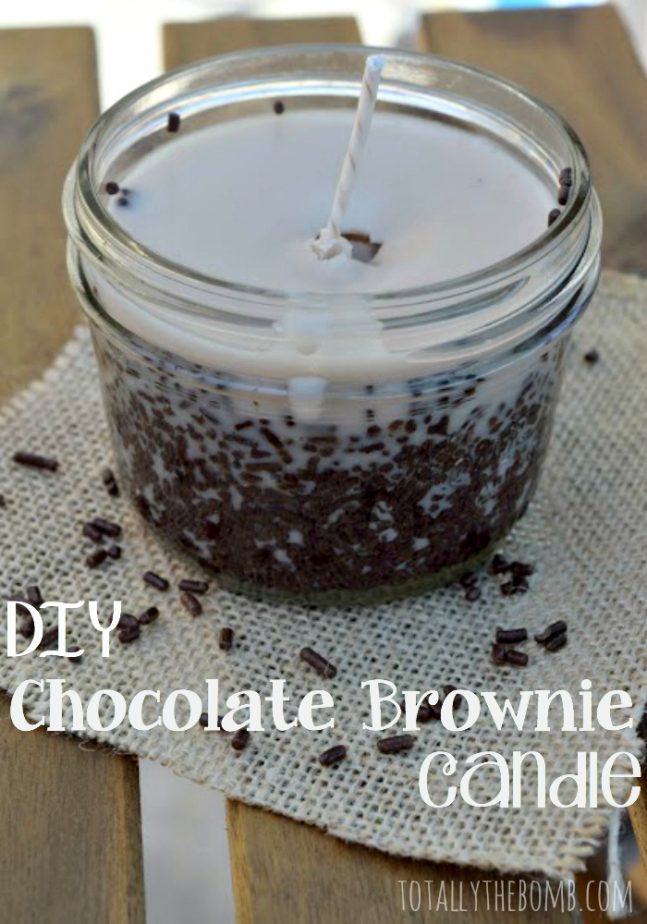
DIY Chocolate Brownie Candle
I am a chocoholic. I am a born of the cloth, down to my DNA, can’t fight the beat (and why would I want to?) unreformed chocoholic. You know that song Amy Winehouse sang about Rehab? That’s me if anyone tries to take away my chocolate. No. No. No. This DIY Chocolate Brownie Candle is basically everything I love about chocolate, but without the lifetime membership on my hips. It has adorable sprinkles, beautiful colors, and OMG, the smell is amazing. It’s basically like walking into what (I imagine) my dreams smell like. So there you have it, folks. If you’re an unrepentant chocoholic like myself, this candle is a MUST-DO for you. Enjoy.
What You Need To Make A DIY Chocolate Brownie Candle:
- 1/2 pint Mason Jar
- Corn syrup
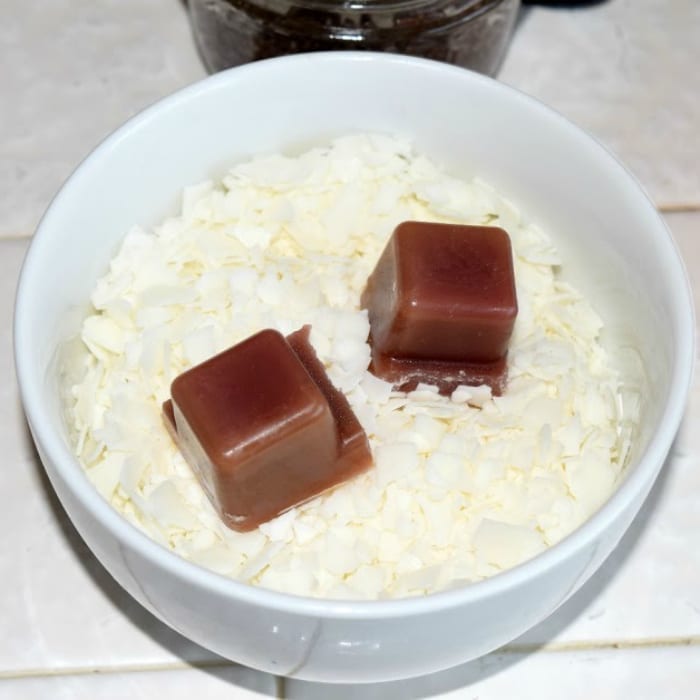
- 2 cups soy wax flakes
- chocolate sprinkles
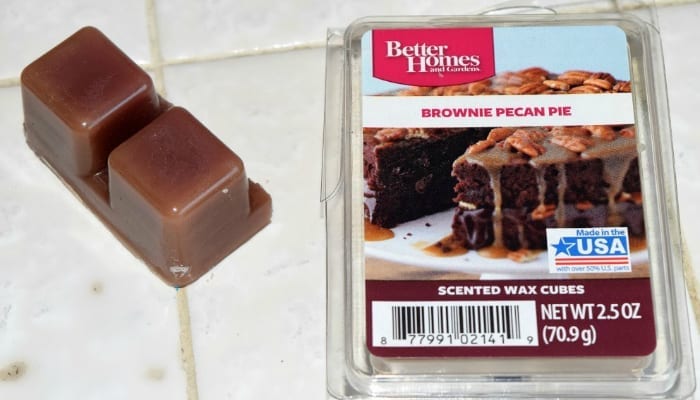
- 2 cubes chocolate brownie pecan pie wax cubes (you can find these at Walmart)
- candle wick
How To Make A DIY Chocolate Brownie Candle:
1. Lay your mason jar on a flat surface and remove the lid. Tilt your mason jar on its side and pour in about 3 Tablespoons worth of corn syrup. While it’s on the side, star rolling it around to make sure the corn syrup covers the sides entirely.

2. Now grab those chocolate sprinkles and pour them into your mason jar and replace the lid. Shake up the contents until all sides are completely covered with delicious brown sprinkles. Remove the lid and pour the excess sprinkles out and back into the sprinkle container.
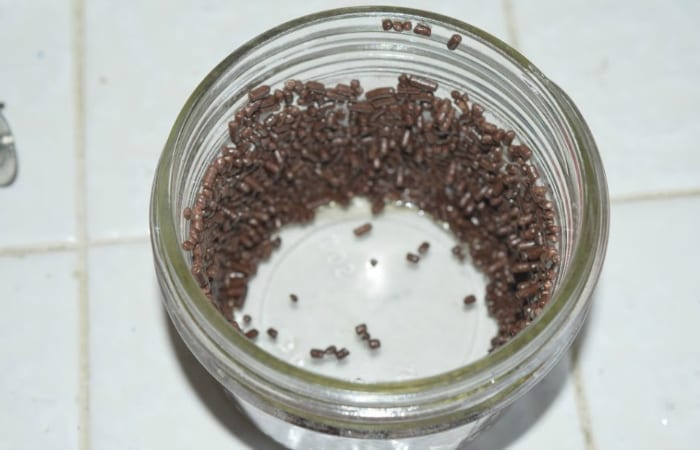
3. Grab your candle wick and apply corn syrup to the bottom and press firmly into the bottom of your mason. Allow to set about 5 minutes to stick to the bottom without shifting.
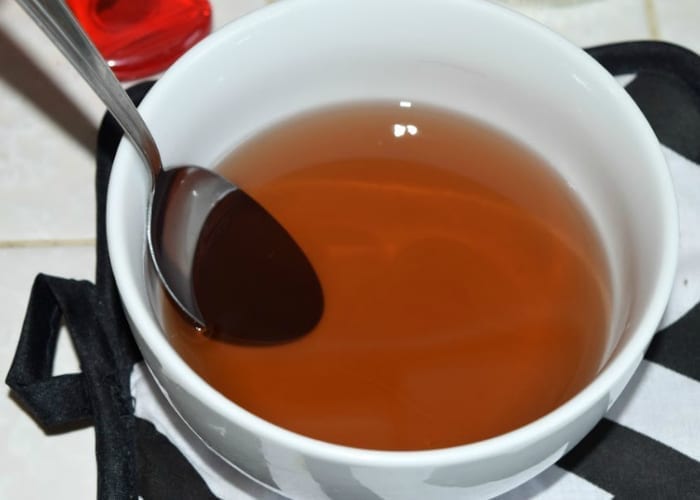
4. Pour the 2 cups of soy wax flakes and 2 of the melting bars into a microwave safe bowl. Microwave for about 3 minutes.
5. Once melted, remove from the microwave and give it a quick stir. Quickly pour your candle wax into the middle of the jar and allow to harden.
6. Be sure to place a spoon on the side of the wick so the wick stays in an upright position.
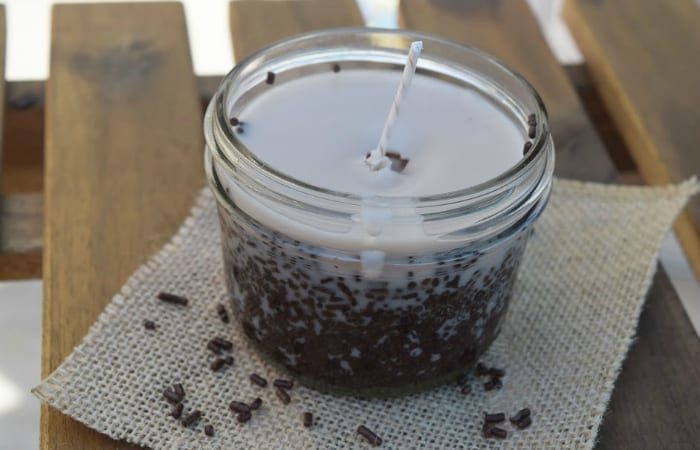
7. The wax will start setting from the bottom to the top and be ready for use in about 1 hour.
8. Once the candle is ready, just cut down the wick to desired length and burn, baby, burn!
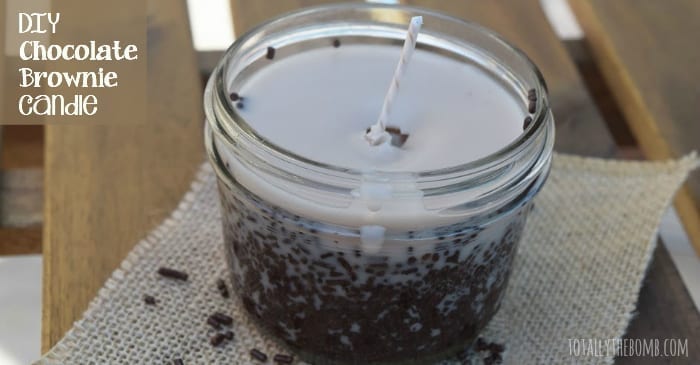

DIY Chocolate Brownie Candle
Ingredients
- ½ pint Mason Jar
- Corn syrup
- 2 cups soy wax flakes
- chocolate sprinkles
- 2 cubes chocolate brownie pecan pie wax cubes you can find these at Walmart
- candle wick
Instructions
- Lay your mason jar on a flat surface and remove the lid. Tilt your mason jar on its side and pour in about 3 Tablespoons worth of corn syrup. While it's on the side, star rolling it around to make sure the corn syrup covers the sides entirely.
- Now grab those chocolate sprinkles and pour them into your mason jar and replace the lid. Shake up the contents until all sides are completely covered with delicious brown sprinkles. Remove the lid and pour the excess sprinkles out and back into the sprinkle container.
- Grab your candle wick and apply corn syrup to the bottom and press firmly into the bottom of your mason. Allow to set about 5 minutes to stick to the bottom without shifting.
- Pour the 2 cups of soy wax flakes and 2 of the melting bars into a microwave safe bowl. Microwave for about 3 minutes.
- Once melted, remove from the microwave and give it a quick stir. Quickly pour your candle wax into the middle of the jar and allow to harden.
- Be sure to place a spoon on the side of the wick so the wick stays in an upright position.
- The wax will start setting from the bottom to the top and be ready for use in about 1 hour.
- Once the candle is ready, just cut down the wick to desired length and burn, baby, burn!

3 Comments