Last Minute Gift Ideas: DIY T-Shirt Shadowbox
If you’re like me, you’ve probably forgotten to get someone a gift. It can be hard to be thoughtful when you’re scrambling at the last minute to put together a present so someone doesn’t feel forgotten. I’ve come up with a solution that is one part unique gift, one part cleaning out your closet: The DIY T-Shirt Shadowbox!
Last Minute Gift Ideas: DIY T-Shirt Shadowbox
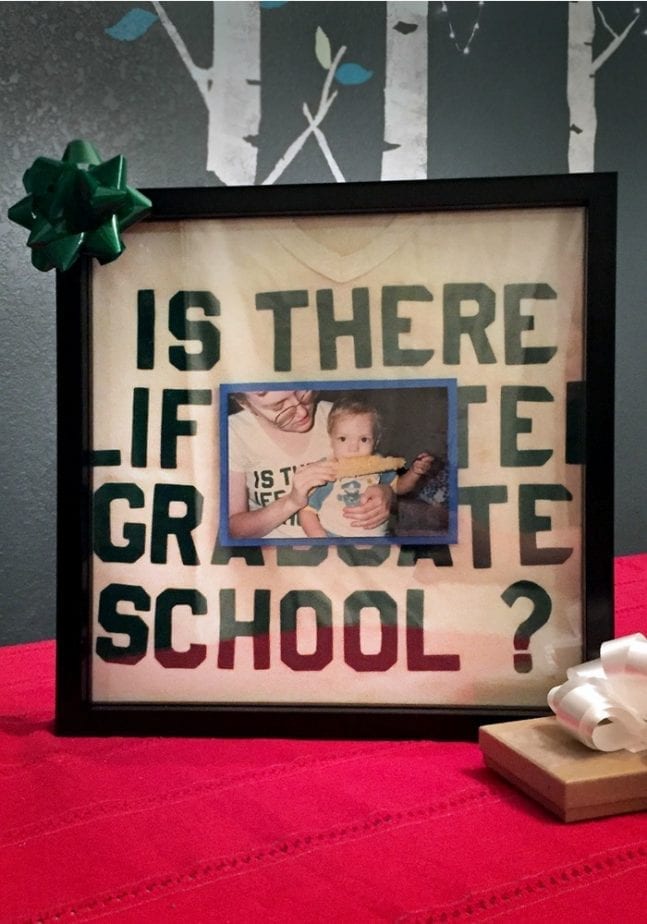
While going though some family photos for another blog post, I ran across a photo of my Mom and my brother. I instantly recognized the t-shirt mom was wearing. It was her super cute fuzzy ironed on letter “Is there life after graduate school?” shirt. My brother and I had just uncovered this shirt while going though some of her things a few weeks ago. The shirt is the sort of thing that we don’t want to throw out because it is so my Mom, but I also know neither of us is ever going to wear it. Now that I had the photo AND the shirt, I knew what I was going to give my brother for Christmas.
What You’ll Need To Make A DIY T-Shirt Shadowbox:
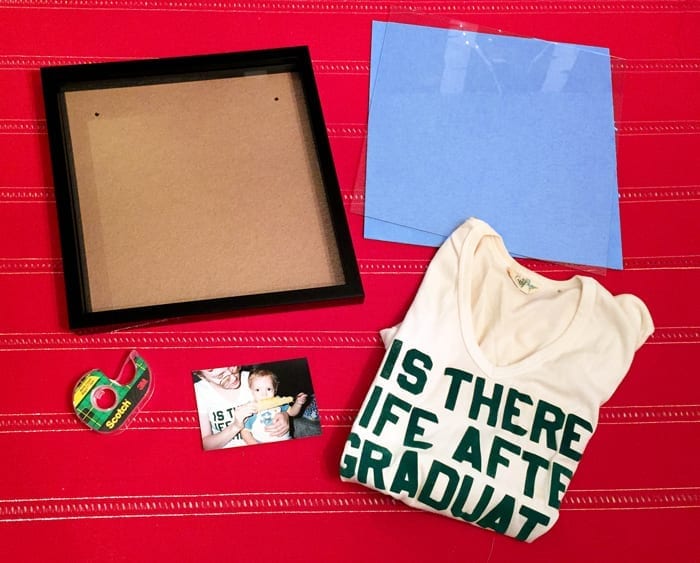
- A 4 layer shadow box (the type that has internal frames that allow for layering)
- An extra piece of glass to fit in the shadow box (Buy a second shadow box (Coupons are your friend!) or go by your friendly neighborhood glass seller and get them to cut you a piece.)
- A T-Shirt
- A Photo
- Tape
- Scissors
- A piece of contrasting colored cardstock or paper
How To Make A DIY T-Shirt Shadowbox:
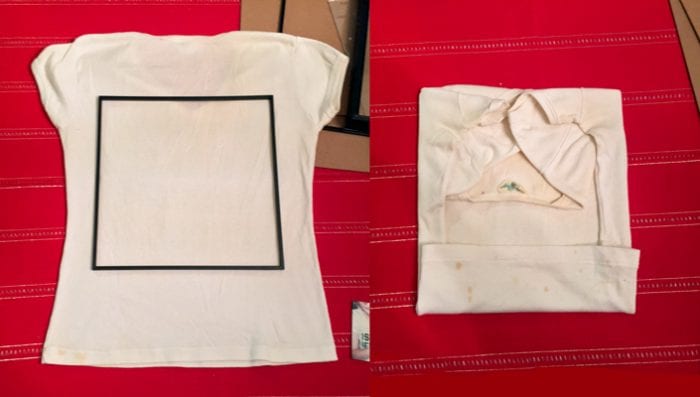
Step 1: Take apart the shadow box and remove 2 of the 3 the internal frames. Wrap the shirt around one of the removed frames, centering the t-shirt design.
Step 2: Take the cardstock and trim it to be half an inch larger on both sides than the photo. That will give you a 1/4 inch frame around the picture. I chose blue because it complimented my brother’s shirt. Add a double sided loop of tape to the back of the photo and affix it to the center of the cardstock. Add additional double sided loops of tape to the back of the cardstock. Center it onto the extra piece of glass and press down to stick.
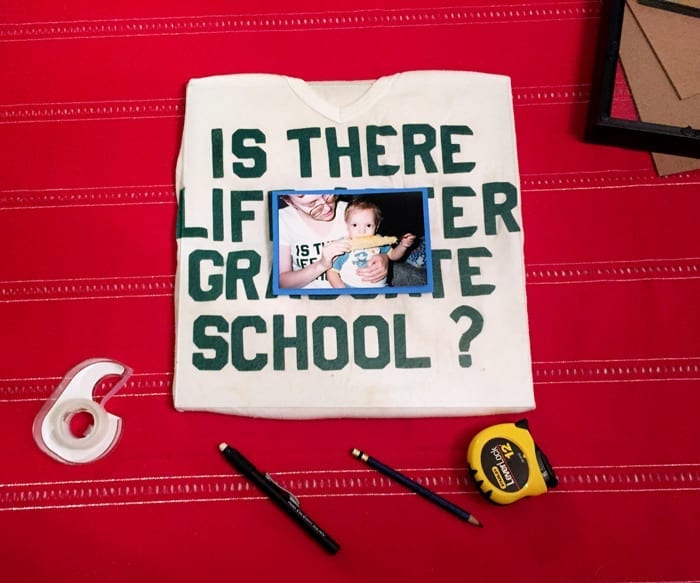
Step 3: Put the piece of glass with the photo into the shadow box. Then, put the t-shirt wrapped frame in next. You won’t need the last frame since you need that space for the back of the t-shirt. Put the back onto the shadowbox, but don’t lock it. Carefully flip the frame over to make sure you like how everything looks. Make your adjustments, then lock the back of the shadow box.
Step 4: Wrap it up and give it to your loved one!