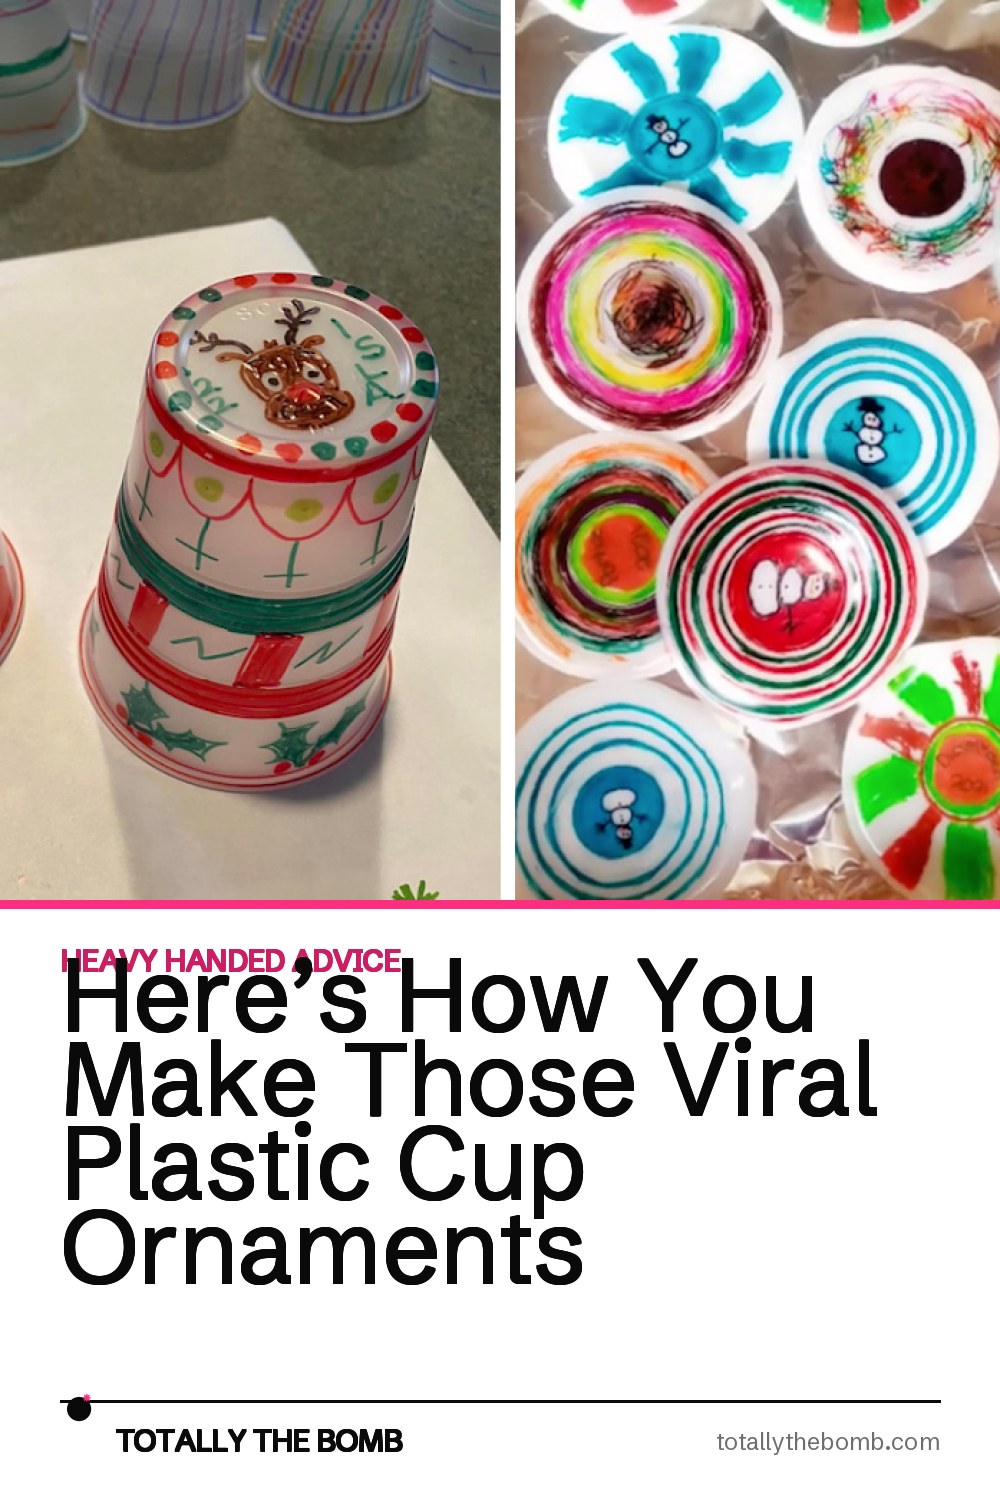
This is the coolest holiday craft to do with kids this Christmas.

Heck, you don’t even need kids! You can just make them all on your own!!

It might be cool to have a girls Crafty Christmas Party, and make homemade cards and these Plastic Cup Ornaments.

Can I come???

These are so much fun, don’t take long at all, and you really don’t even need to be able to draw.

As long as you can grab a marker and slap some color on a plastic cup, you can totally make these!

The premise behind these Plastic Cup Ornaments are akin to the Shrinky Dinks that we used to make when we were kids.

How To Make Plastic Cup Ornaments
First of all, the type of cup you get is pretty important.

After much trial and error, it has been noted that the 9 ounce clear plastic cups with the #6 on the bottom work the best.

Then, you are going to grab Sharpie Markers, and get to coloring the cups.

Make designs, draw pictures on the flat bottom part, just color in solid lines — you can’t really go wrong here. Just use your heart as a guide.

You want to punch a hole in the cup right at the lip on the top of the cup. This will melt down, and leave room to hang your ornament on the tree when you’re done.

Next, you want to grab a cookie sheet, and line it with aluminum foil.

Put the completed plastic cups upside down onto the cookie sheet. The flat bottom should be up in the air.

Allow plenty of space in between each cup so they don’t melt together.
Preheat your oven to 400º Fahrenheit (205º Celsius).

Once your oven is done preheating, put the cookie sheet holding the cups into the oven.
This Is A Very Important Step For Making The Viral Cup Ornaments
You want to stand there and watch the cups the entire time they are in the oven.

It will only take about 1 minute and 15 seconds to melt them down into an ornament, so don’t walk away!
Let the cups melt until the center is completely melted down flat.

Carefully take the cookie sheet out of the oven, and use a spatula to flatten the edges and remove the plastic ornament from the aluminum foil.

They will harden pretty quickly, so you want to work quickly.
Let them finish hardening, and VOILA! Beautiful, handmade ornaments to hang on your tree.

These would totally make great gifts to give away to neighbors, coworkers, or friends!!