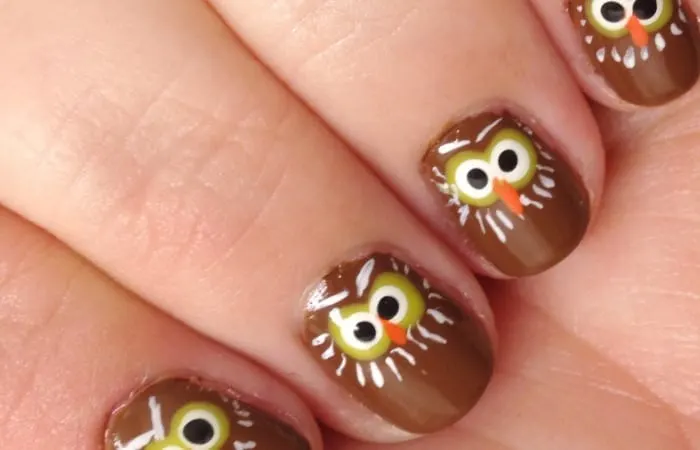
There are a lot of owl nails out there, but these little guys are still ridiculously cute for fall. The whole design is basically circles, feathers and one tiny beak.
What you need
- Brown nail polish
- Yellow-green polish (or yellow or gold)
- White polish
- Black polish
- Orange polish
- A dotting tool, sewing-pin head or toothpick
- A small striping brush
- Clear top coat
How to paint owl nails
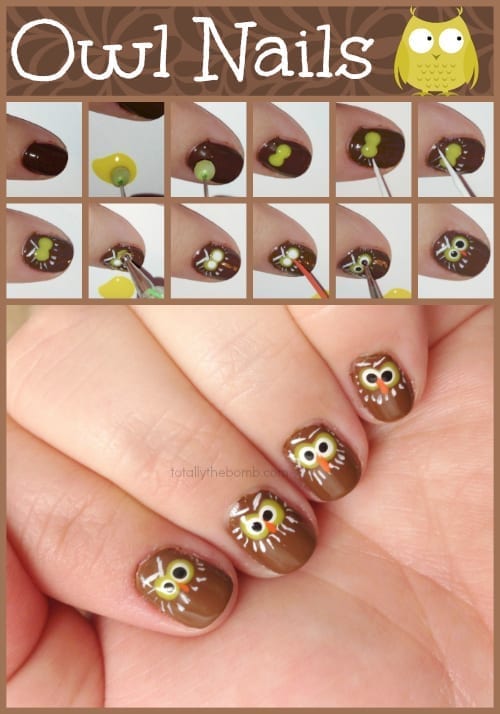
The step-by-step images below are AI-generated illustrations based on our original owl nail design. The original photo tutorial is included below.
-
Start with a brown nail. Paint the nail brown and let the base dry.

AI-generated tutorial illustration based on the original TTB owl nail design. -
Make two big eye circles. Dot two yellow-green circles right next to each other. Yellow or gold polish works, too. Let them dry before adding the next layer.

AI-generated tutorial illustration based on the original TTB owl nail design. -
Add the feather details. Use a thin brush and white polish to add tiny feather marks around the face and two little eyebrows.

AI-generated tutorial illustration based on the original TTB owl nail design. -
Build the eyes. Add a smaller white circle inside each yellow-green one. Once those are dry, add a tiny black pupil to each eye.

AI-generated tutorial illustration based on the original TTB owl nail design. -
Add the beak. Paint a small orange triangle just below and between the eyes.

AI-generated tutorial illustration based on the original TTB owl nail design. -
Seal it. Let all the details dry, then gently finish with clear top coat.

AI-generated tutorial illustration based on the original TTB owl nail design.


Make them feel more like fall
Pair one owl accent nail with cream, rust, deep beet red or olive green. You keep the original little owl face without needing to hand-paint ten of them.
For more fall-tastic nails, check out these 60 Thanksgiving nail art ideas and our football nails.