This DIY Niffler Necklace is so Cute, I’m Hoarding It.
Let’s be clear, when Fantastic Beasts originally came out, the Niffler was my bae. And this DIY Niffler Necklace is so Cute, I’m Hoarding It.
And if you want to take it away, you’d better think twice.
But, making this cute little guy was so easy, you can DIY yourself a whole nest, if you wanna.
This DIY Niffler Necklace is so Cute, I’m Hoarding It.
So, let’s chat about the niffler for a minute.
I’d like to point out that, in Fantastic Beasts 2 The Crimes of Grindelwald, the niffler was, undoubtably, the hero.
No, really–if Newt Scamander hadn’t had the niffler with him and the niffler hadn’t stolen the thing…well, then the whole thing would have been…ugh!
Just watch it and make your own DIY Niffler Necklace.
Because this little guy deserves ALL the credit and love.
And gold.

Now, I’m not a huge polymer-clay-maker-person, although I really do enjoy it.
So, this might be basic for some, but hopefully I’m not too weird.
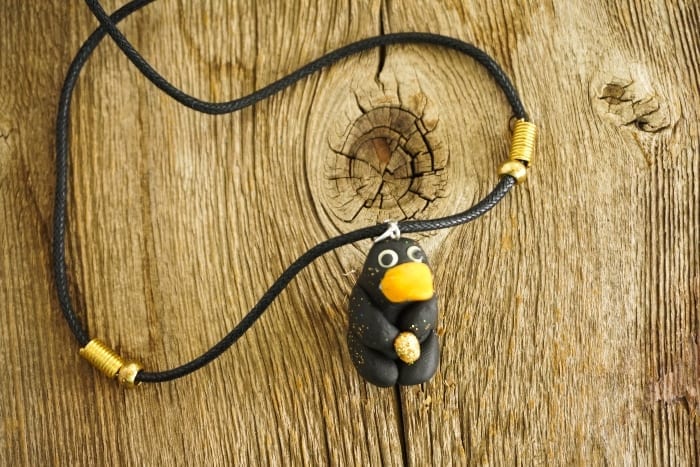
I used Filmo Kids (yeah, that’s what my craft store had) and I just started with a hunk of black that was about the size I wanted my final little niffler to be.
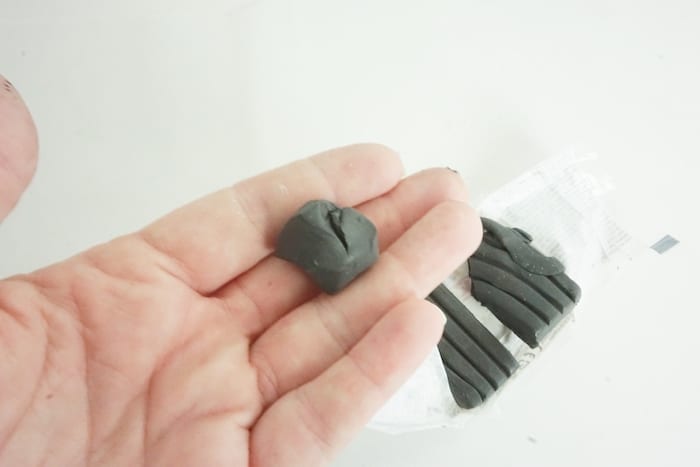
I pulled off four really small pieces, maybe 1/10 the size of the whole chunk, then pulled off another 1/3 of the remaining.
Not to be confused, those pieces I pulled off were just set aside because I can only work with one piece at a time. LOL!
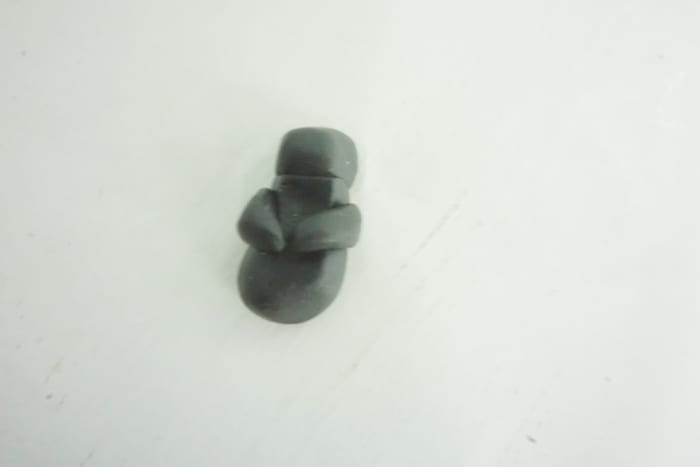
This last piece I worked into a cylinder and flattened the front and back, making this body shape.
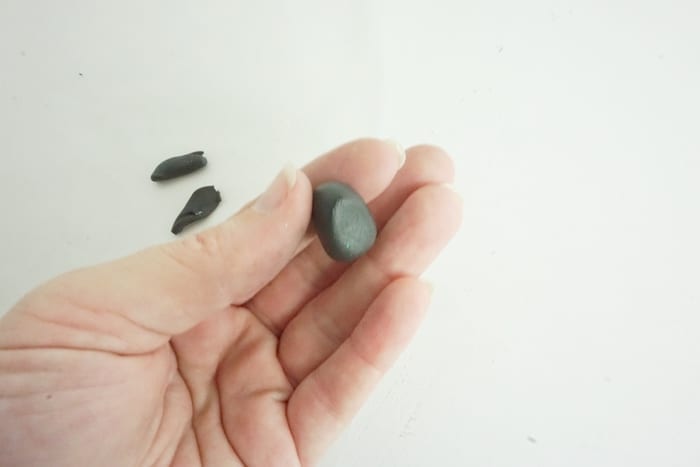
Then I grabbed the 1/3 portion I had set aside.
This one, I just rolled into a ball, then flattened it’s back and kind of pointed it’s front. This formed the face.
And I just mushed it on top of the body, because the niffler doesn’t really have a defined neck or anything.

At this point, I grabbed those little pieces I’d stashed earlier and made them into little cylinders.
Little bitty ones that would work for arms and legs.
But not too long, because that would be weird.
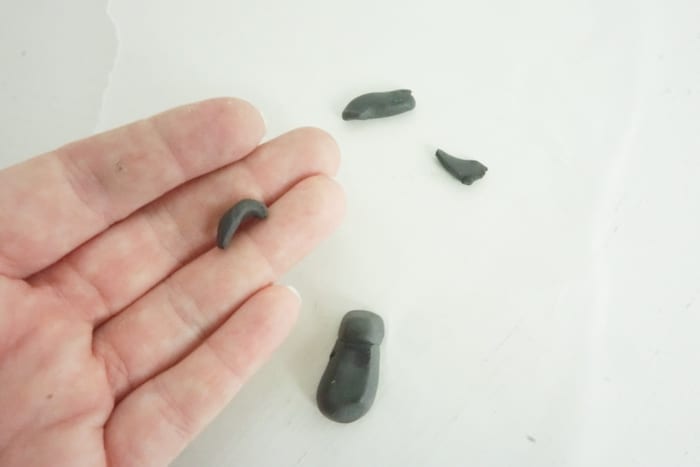
And, again, I just kind of mushed those on, because the niffler, despite being so cute I could just die, has basically no defined anything–not even shoulders.
Or butt.
LOL!
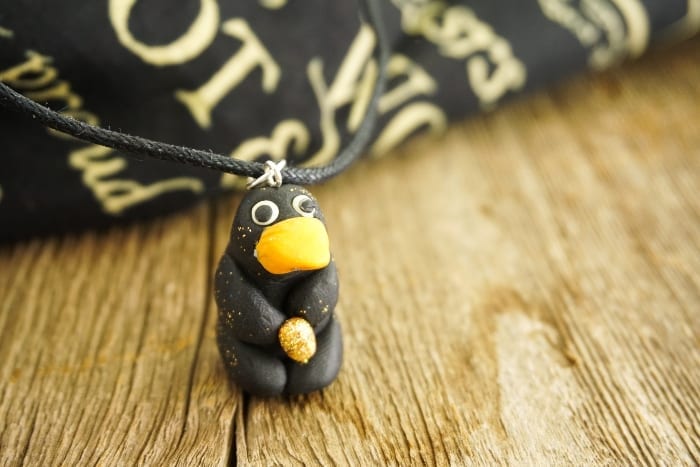
For the niffler’s “beak” (is it a beak? or a bill? what do you even call that protuberance on his face?!), I grabbed a little orange clay, then mushed it into a triangle.
The back has to be kind of flat, and the beak itself elongated to fit the face…so, it kind of turned into a wide triangle before I was all said and done.
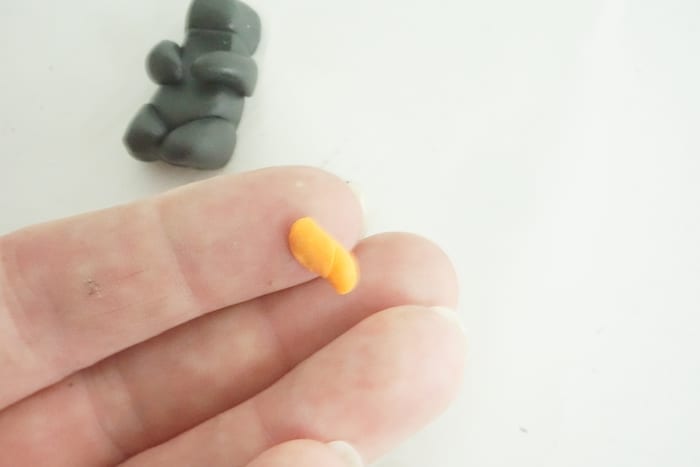
Mushing that onto his face really made me feel like my little DIY niffler necklace was coming together.
But, I felt like something was missing…eyes, perhaps?
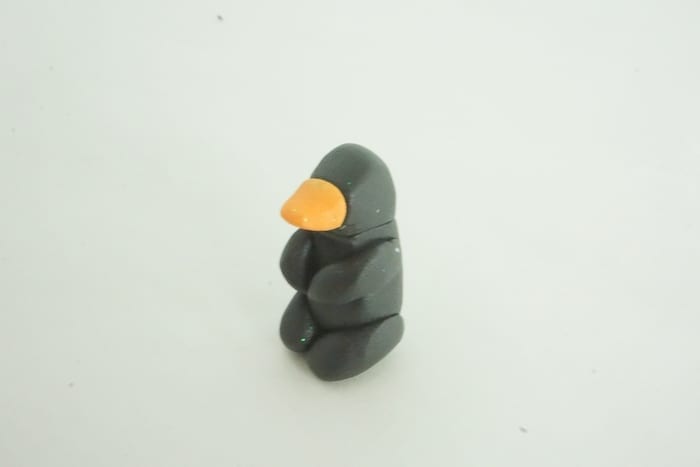
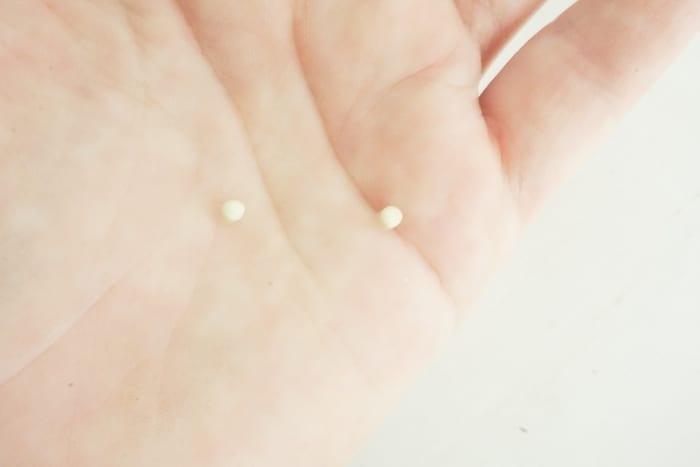
I wanted you to be able to see his eyes, despite the fact that the niffler in the movies just has black eyes…so I made a couple of ridiculously small balls of off-white.
Then some even smaller balls of black.
I mashed those on, above the beak and he suddenly had a face!
But, I still felt like my DIY niffler necklace was missing something…
Something really important to the niffler…
GOLD!
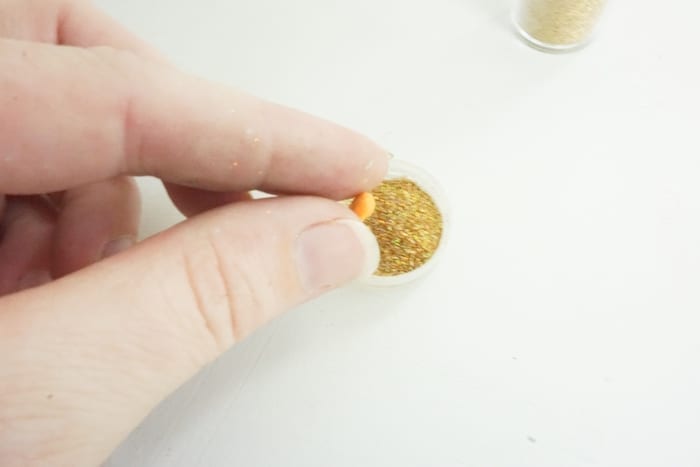
So, I made him a tiny ball of orange.
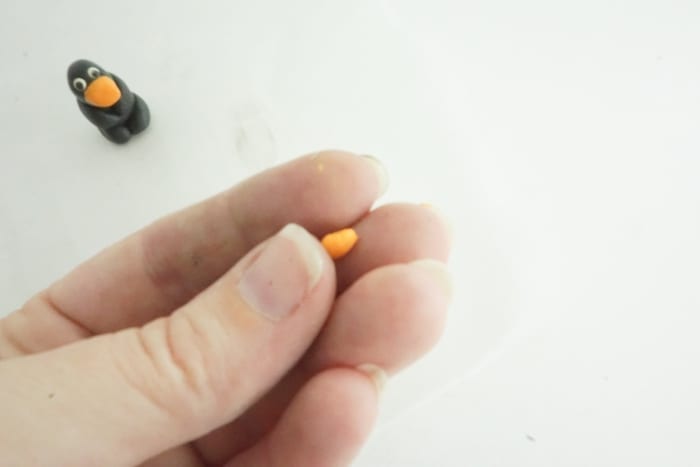
Then, rolled it in gold glitter.
No glue or anything–just roll the clay in glitter, it’ll stick.
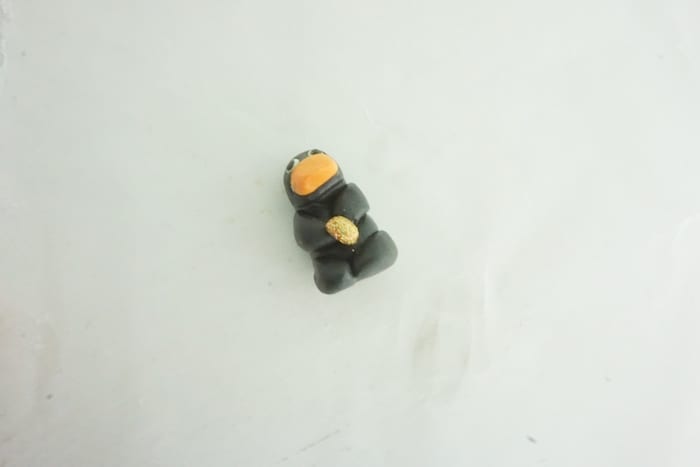
Before I could get it finished, the niffler grabbed the gold nugget and clutched it in his little hands.
Just kidding–I put it there.
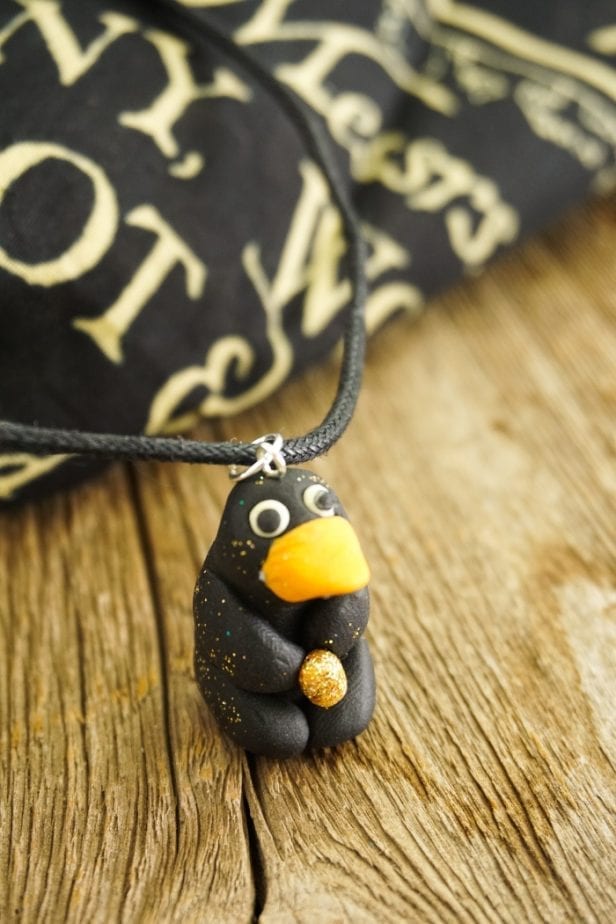
And then it was time to make this adorable niffler into an actual necklace.
Now, I got these eye pins that were really long. If you can find some that are shorter, great, but mine were like the length of 10 nifflers, so I had to cut it down to about a half-inch.
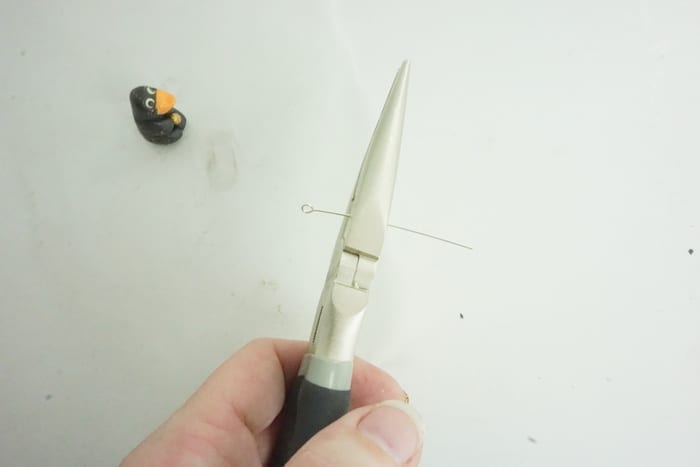
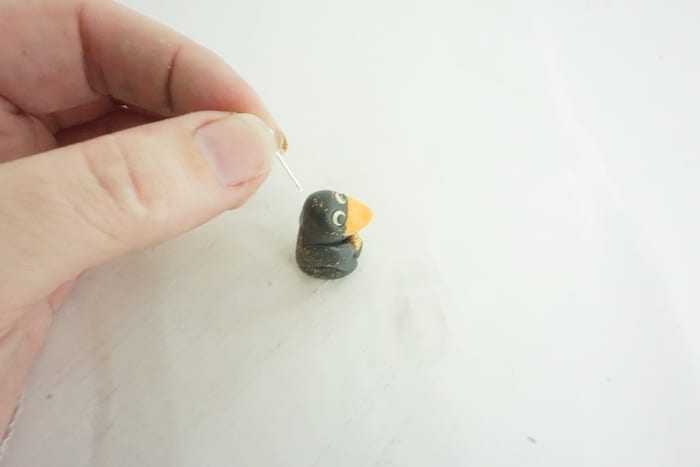
Then I just slid that eye pin in the top of my niffler’s head, near the back.
It might be cute to do it off to the side or something, so he’s laying on his side when you’re wearing the necklace.
Or even in the center of the gold, so it looks like he’s grasping the nugget that’s on your necklace…but I didn’t think that far ahead. LOL!
You should definitely follow the directions of the clay you choose, but mine said to bake at 230-degrees for 30 minutes, so that’s what I did.
I sealed it with some sealant I had and let it air-dry overnight.
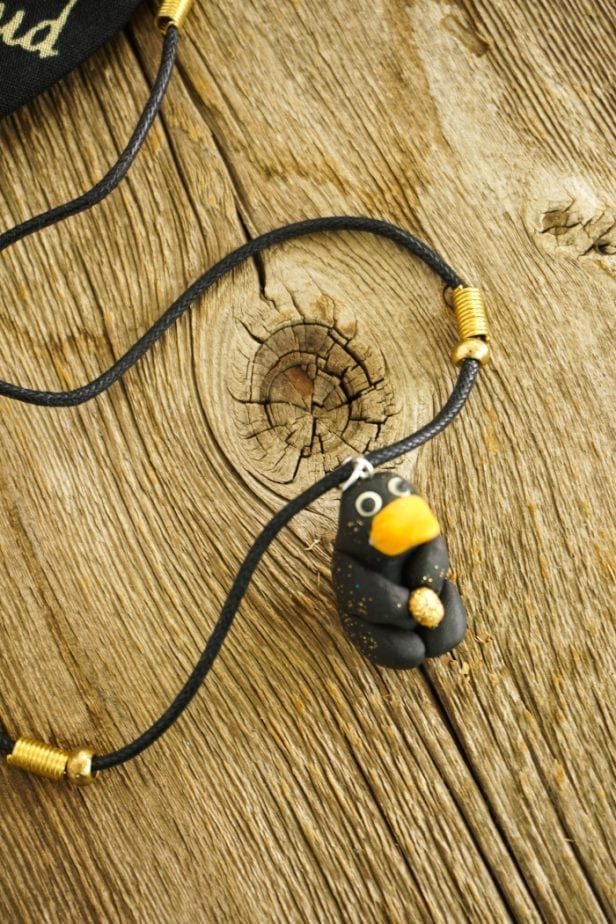
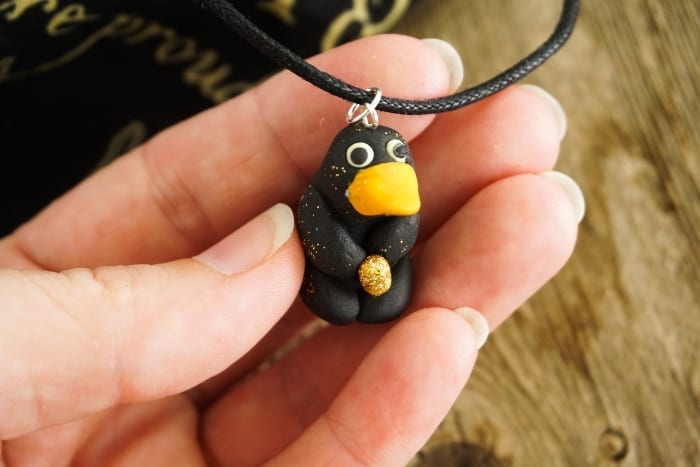
Then I had this perfect little DIY Niffler Necklace pendant that I just slid onto a an old cord necklace I had laying around.
Super cute, simple and fun, I really, genuinely love this DIY Niffler Necklace.
I did get a little glitter on him, but I figured that’s ok.
So, you’re in for making your own DIY niffler necklace, but you don’t have any polymer clay? Oh no!
Just kidding, it’s no big deal.
Just pin this to your favorite Harry Potter crafts board, that way you can find it easily when you get back from the craft store!
Now, let’s get your niffler on. LOL!

DIY Niffler Necklace
Equipment
- Plier and wire cutters
- Wax Paper
- Oven
- Paintbrush
Materials
- ⅒ package black Filmo polymer clay
- 1/32 package orange FIlmo polymer clay
- World’s tiniest speck of off-white Filmo polymer clay
- Clay sealant
- Gold glitter
- 1 eye pin
- 1 jump ring
- 1 cord necklace
Instructions
- Break off a hunk of black clay that is about the size you'd like your final niffler to be.
- Separate black clay into portions: 4 pieces about 1/10 the size of the hunk, one piece 1/3 the size of the remainder.
- Shape the biggest piece into a fat cylinder and flatten the "front" and "back" forming the body.
- With the 1/3 portion of clay, roll it into a ball, flatten the back, then elongate the front, forming the head.
- With the four remaining 1/10 portions, form small cylinders and place on the body as arms and legs wrapping around toward the front.
- To make the beak, use the orange clay to form a wide, long triangle with a rounded front and fat back the same size and width as the face.
- Place beak on the face.
- Make 2 very small off-white balls with the off-white clay and mush them onto the face above the beak.
- Make 2 even smaller black balls of black clayand mush them onto the white circles you just placed.
- Form a tiny ball of orange clay and roll it in the glitter.
- Place this tiny golden nugget in the niffler's hands.
- Trim the eye pin to about 1/2-inch long.
- Slide eye pin into the top of the niffler's head or wherever you want.
- Place the snitch into the oven on wax paper for 30 minutes.
- Remove from the oven and allow niffler to cool completely.
- Seal the niffler.
- Attach a jump ring to eye pin .
- Thread necklace into jump ring.
- Enjoy!


I didn’t have some expectations regarding that name, but the
longer I was amazed. The writer did a excellent job. I spent a
few minutes studying and checking the facts. Everything is very clear
and understandable.