How To Make A Christmas Wreath. It’s Easier Than You Think.

I do not have an artistic bone in my body. So, when the kids’ school said we were taking a field trip to learn how to make wreaths, I panicked a little.

I did NOT want to embarrass myself in front of grown adults, showing off my toddler-level skill set at all things creative and artsy! It’s quite possible a toddler could, in fact, out craft me.

We got to the “farm,” and they had barrels full of every kind of Christmas greenery imaginable. They even had dried berries and pinecones you could choose from to embellish your wreaths a bit.
I’m not going to lie, my first thought was, “I’m in hell. Holiday hell.”

But, I wanted to put on a good face — be the good example — for my kids, so I went and found a place at one of the many tables to sit at.
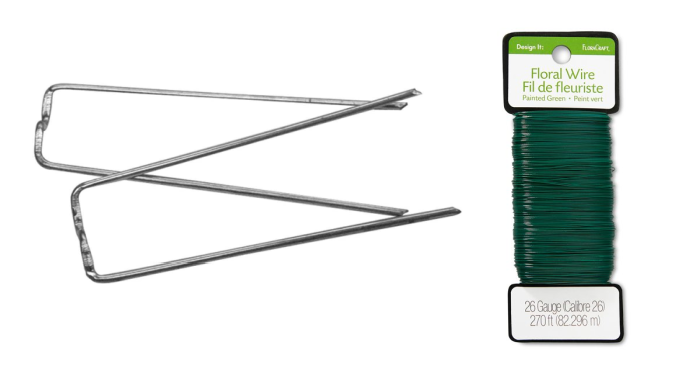
In front of our seats, all nice and neat on the table, was a wreath form, some (what I now know are called) greening pins, some scissors, and some floral wire.
What the heck was I supposed to do with all this??

It was my daughter, actually, who started me on my wreath-making quest. She hadn’t ever made a wreath, but she has an insane sixth sense when it comes to craft things.
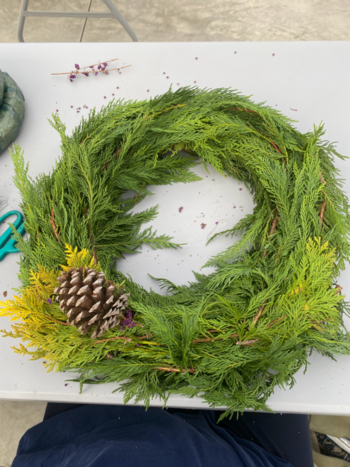
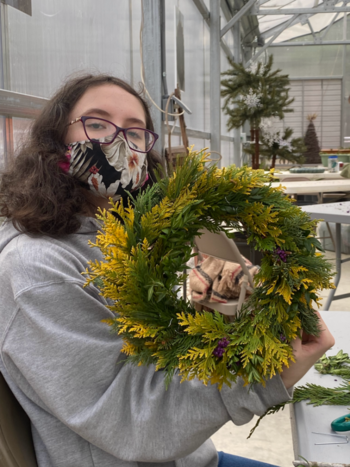
We went to pick out our greenery — I decided to keep it simple with some pine Christmas greenery, but my daughter went wild, choosing different colors of greenery, different berries, and anything else she could scoop up.
She showed me how to put the greenery on the wreath form, and it was a very painless process. It was actually fun!!

And, best of all, there was no WRONG way to make your wreath.
Heck, my 10-year-old son — who takes after me in the artsy department (poor child) — made his own modge podge wreath, and it’s adorable!! We actually hung it on our front door!

I think this is going to become a yearly tradition! Why pay $75 or more for a wreath, when you can make your own for WAY less than half of that?!?

Here’s How To Make Your Own Wreath
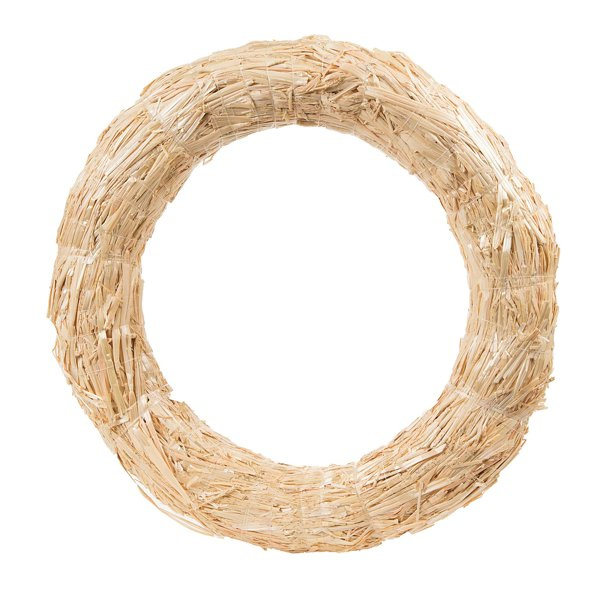
You need to start out with a wreath form. We used a simple straw form, and there wasn’t any hot glue or wrapping wires around everything involved. It was so simple!!
Next, get whatever greenery you like. No, it doesn’t have to be REAL greenery. They have plenty of awesome faux greenery at most craft stores.
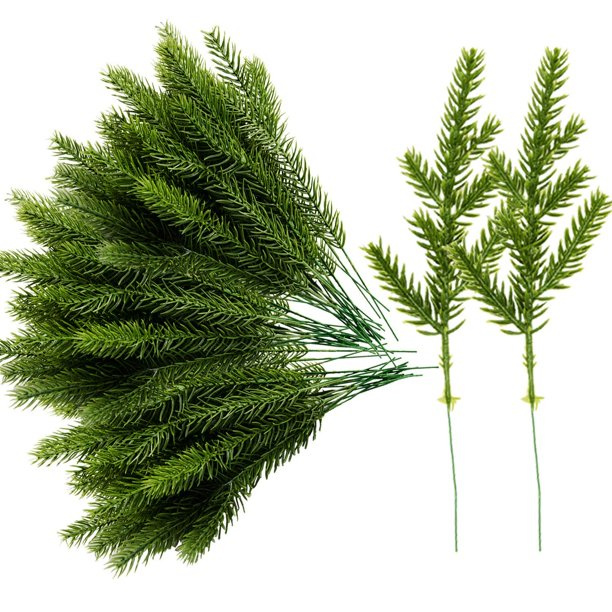
You can keep it simple, and go for all one kind of greenery. Or, you can go wild, incorporating different colors and textures — maybe pinecones and ribbon.
You’ll also need some greening pins, some floral wire, and a pair of scissors.
Now, you just get to creating. You don’t even have to have a plan, just start pinning things in place with your greening pins.
Don’t be afraid to cut the greenery if needed. Just pin the pieces on with your greening pins.

Start with the inside of the wreath, and work your way to the outside. You want to cover every surface that can be seen when you hang it.
You might have to bend the branches around. No big deal. Just use a couple greening pins to hold your branches in place.
When you get all the greenery where you think you want it (you can always add more later), you start pinning your embellishments on — your pinecones, ribbons, etc.
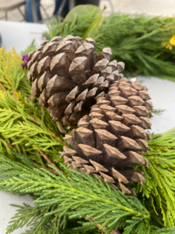
To get the pinecone on the wreath, just wrap some floral wire around the inside of the pinecone — where it can’t be seen. Leave enough floral wire at the ends to wrap around a greening pin, then poke that greening pin down into the wreath form. You can always move it if you don’t like it!!
That’s pretty much it!! You can keep going, making it full and gorgeous. Or, you can keep it simple, and just add a bit of greenery, and maybe a pinecone or two.
I promise — if I can do it, you can too!
Happy wreath making and a blessed holiday season!